顯示具有 qt 標籤的文章。 顯示所有文章

2016年10月8日 星期六

Qt for Native Client (and emscripten)

這篇是個失敗案例, 我沒能成功搞定我想做的事情。

對於 web 開發技術我還停留在 cgi 的時代, 看過《[科技]JavaScript的诞生与死亡(双语字幕)》這影片後, 對這樣的技術有興趣, 找了相關資料。

影片中提到的技術是把 c/c++ 程式碼編譯成 javascript, 在瀏覽器執行, 那是所的有 library 都可以嗎? 自然沒有這麼好的事情, gui library 只支援 sdl, 所以用 sdl 寫的程式才能享受這樣的福利。這也就是為什麼有些模擬器可以在瀏覽器執行的原因, 他們是用 sdl 寫的。

我個人使用的 gui framework 是 qt, 我馬上就想到 qt 也可以嗎?
答案是肯定的, Qt for Native Client (and emscripten) 就在說明如何辦到這件事。

Qt for Native Client 是什麼意思? 簡單來說就是用某種方式把 qt 編成另外一個編碼, 然後在瀏覽器上執行這種編碼的 qt 程式。
有幾個方法:
  • google 的 nacl
  • mozilla 的 emscripten
我個人偏愛 mozilla 的 emscripten, 可以編出 javascript code, 可在任意瀏覽器執行, 而 google 的 nacl 只能在 google chrome 上執行。

emscripten-qt是舊的, 可以參考, 但不要用這個, emscripten-qt 是 qt 4.x 已經過時, 而我花了不少時間也搞不出來。

google nacl

download google nacl_sdk,
執行 ./naclsdk install 安裝 nacl sdk。

export NACL_SDK_ROOT=/home/descent/mygit/nacl_sdk/pepper_49

git clone https://code.qt.io/qt/qtbase.git .
git checkout wip/nacl

./nacl-configure linux_pnacl release x86_64 -v # linux
./nacl-configure mac_pnacl release x86_64 -v # mac
make

download demo code:
https://github.com/msorvig/qt-nacl-manualtests.git 

qt-nacl-manualtests/window_widgets
qmake window_widgets.pro
make

執行
~/mygit/qtbase/bin/nacldeployqt --run window_widget.nexe
~/mygit/qtbase/bin/nacldeployqt --run digitalclock.nexe

fig 1 為 chrome 上執行畫面。
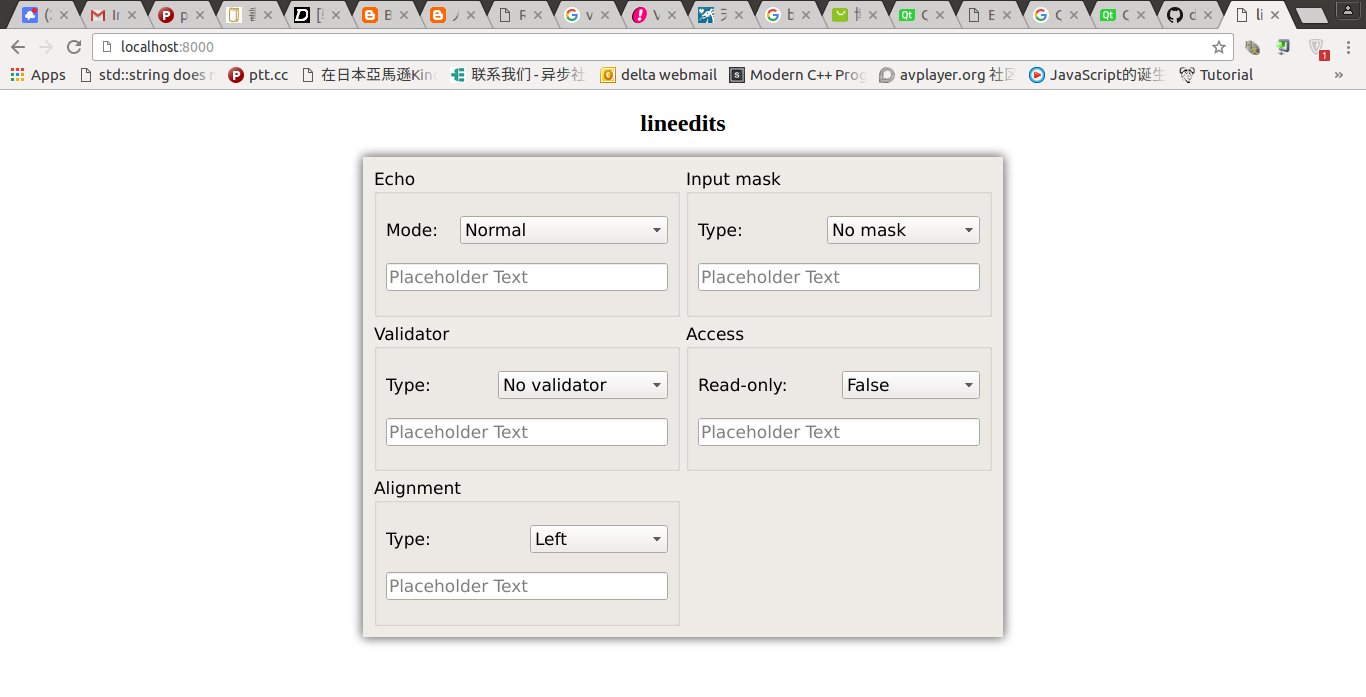
fig 1 . qt lineedit program, but cannot input text

mozilla emscripten


install emscripten sdk
Download and install emscripten

裡頭有 emcc, em++, 可以寫個 hello.cpp 來測試,

em++ -o h.html h.cpp

把 h.html 丟到瀏覽器試試, 中文也可以透過 cout 秀出。 疑! 怎麼沒程式碼, 拜託, hello world 不用我寫給你看吧!

git clone https://code.qt.io/qt/qtbase.git .
git checkout wip/nacl

export NACL_SDK_ROOT=/home/descent/mygit/emscripten
./nacl-configure emscripten release x86-64

還需要:

  • qt-everywhere-opensource-src-5.7.0/qtwebengine/src/3rdparty/chromium/ppapi
  • qt-everywhere-opensource-src-5.6.0/qtwebengine/src/3rdparty/chromium/ppapi (font_dev.cc)


當編譯錯誤時, 請參考錯誤訊息, 把相關的 ppai 檔案連結到相關目錄, 總之就是少了 qt-everywhere-opensource-src-5.6.0/qtwebengine/src/3rdparty/chromium/ppapi 這個程式碼。

descent@u64:js_qt$ ls qtbase/include/ppapi -l
lrwxrwxrwx 1 descent sambashare 89 Oct  7 09:31 qtbase/include/ppapi -> /home/descent/qt-everywhere-opensource-src-5.7.0/qtwebengine/src/3rdparty/chromium/ppapi/

descent@u64:ppapi_cpp$ ls -l /home/descent/mygit/emscripten/src/ppapi_cpp
lrwxrwxrwx 1 descent sambashare 93 Oct  7 09:49 /home/descent/mygit/emscripten/src/ppapi_cpp -> /home/descent/qt-everywhere-opensource-src-5.7.0/qtwebengine/src/3rdparty/chromium/ppapi/cpp/

font_dev.cc 要在 qt 5.6 的 qtwebengine/src/3rdparty/chromium/ppapi 才有
descent@u64:ppapi_cpp$ ls -l font_dev.cc 
lrwxrwxrwx 1 descent sambashare 108 Oct  7 09:50 font_dev.cc -> /home/descent/qt-everywhere-opensource-src-5.6.0/qtwebengine/src/3rdparty/chromium/ppapi/cpp/dev/font_dev.cc

最後我可以編譯出 qt-nacl-manualtests/window_widgets 的 window_widgets.html window_widgets.js 檔案, 可是無法在瀏覽器執行, 恨阿!
搞定, 原來也是要執行 nacldeployqt, 媽的勒!

export NACL_SDK_ROOT=/home/descent/mygit/nacl_sdk/pepper_49
~/mygit/qtbase/bin/nacldeployqt -q

-rw-rw-r-- 1 descent descent    95674941 Oct  7 14:07 analogclock.js
-rw-rw-r-- 1 descent sambashare     1131 Oct  7 14:07 index.html
-rw-rw-r-- 1 descent sambashare     9175 Oct  7 14:07 qtloader.js

90 Mb 的 analogclock.js, 很嚇人吧!

index.html 會呼叫 qtloader.js 來載入 analogclock.js。

會產生 index.html, fig 2, fig 3 是執行畫面。

fig 2. qt analogclock on chrome

fig 3. qt analogclock on firefox

不過似乎無法輸入, 也無法按下按鈕, 只有靜態網頁的話還真是可惜。而中文也無法正常秀出。

google 的 nacl, mozilla 的 emscripten 都需要改動 qt source, main 需要用 Q_WIDGETS_MAIN(app_init, app_exit) 取代。

而 main.cpp L42, 43 這兩個 header files 是需要的, 否則編譯不過。

main.cpp
 1 
41 #include <QApplication>
42 #include <QtGui>
43 #include <QtWidgets>
44 
45 #include "analogclock.h"
46 
47 #if 0
48 int main(int argc, char *argv[])
49 {
50 }
51 #endif
52 
53 void app_init(int argc, char **argv)
54 {
55 #if 0
56     window = new QWidget();
57     QLabel *label1 = new QLabel("Hello World");
58     QLabel *label2 = new QLabel("Bye World");
59     QLineEdit *lineEdit = new QLineEdit;
60     QPushButton *pushButton = new QPushButton("PuhsIt");
61     QVBoxLayout *layout = new QVBoxLayout;
62     layout->addWidget(label1);
63     layout->addWidget(lineEdit);
64     layout->addWidget(pushButton);
65     layout->addWidget(label2);
66     window->setLayout(layout);
67     window->show();
68 #endif
69     //QApplication app(argc, argv);
70     AnalogClock clock;
71     clock.show();
72     //return app.exec();
73 }
74 
75 void app_exit()
76 {
77     //delete window;
78 }
79 
80 Q_WIDGETS_MAIN(app_init, app_exit);

這兩個範例是我由 qt examples 修改而來

  • https://github.com/descent/qt-nacl-manualtests/analogclock
  • https://github.com/descent/qt-nacl-manualtests/tree/dev/lineedits


ref:
運用 Emscripten 移植遊戲 (上)

2014年9月14日 星期日

qt 5.4 alpha for android

1st edition: 20131002
2nd edition: 20140914

qt 5.4 alpha

env:
debian 32 bit
ndk: android-ndk-r10
sdk: adt-bundle-linux-x86-20140702

為了 camera 的問題, 終於等到你。

../qt-everywhere-opensource-src-5.4.0-alpha/configure  -xplatform android-g++ -nomake tests -nomake examples -android-ndk /home/descent/and-dev/android-ndk-r10 -android-sdk /home/descent/and-dev/adt-bundle-linux-x86-20140702/sdk -android-ndk-host linux-x86 -android-toolchain-version 4.8 -skip qttranslations -skip qtwebkit -skip qtserialport -skip qtwebkit-examples

不過在我辛苦 build 好 5.4 之後, camera app 還是無法正常在我的 kolin 7 吋平版上使用。

白作工了。

qt 5.2 alpha

env:
ubuntu 12.04 64bit
qtcreator : 2.8.0
g++ version: (Ubuntu 4.8.1-2ubuntu1~12.04) 4.8.1
ndk: android-ndk-r9
sdk: adt-bundle-linux-x86-20130522
android api 版本安裝了 10, 11, 16, 17, 18 有些沒裝會出錯, 這是我一一補齊的結果。

這次畫面總算對了。


qt 5.2 alpha 沒有 binary 可用, build from source.

get qt 5.2 alpha source code:
http://download.qt-project.org/development_releases/qt/5.2/5.2.0-alpha/single/

ref:
build android qt version from source code:
http://qt-project.org/wiki/Qt5ForAndroidBuilding

我自己用的 configure 參數:
export ANDROID_BUILD_TOOLS_REVISION=18.1.0
所以 build-tools path 是
adt-bundle-linux-x86-20130522/sdk/build-tools/18.1.0

../qt-everywhere-opensource-src-5.2.0-alpha/configure -developer-build -xplatform android-g++ -nomake tests -nomake examples -android-ndk /home/descent/android-dev/android-ndk-r8e -android-sdk /home/descent/android-dev/adt-bundle-linux-x86-20130522/sdk -android-ndk-host linux-x86 -android-toolchain-version 4.7 -skip qttranslations -skip qtwebkit -skip qtserialport -skip qtwebkit-examples 

../qt-everywhere-opensource-src-5.2.0-alpha/configure  -xplatform android-g++ -nomake tests -nomake examples -android-ndk /home/descent/android-dev/android-ndk-r9 -android-sdk /home/descent/android-dev/adt-bundle-linux-x86-20130522/sdk -android-ndk-host linux-x86_64 -android-toolchain-version 4.8 -skip qttranslations -skip qtwebkit -skip qtserialport -skip qtwebkit-examples 
-developer-build 會把 warnning 當成錯誤, 所以我拿掉了。
記得
make install
這步驟一定要做, 要不然設定 qtcreator 會怪怪的。

qt 5.2 安裝後的目錄結構:
ls /usr/local/Qt-5.2.0/
bin  doc  imports  include  jar  lib  mkspecs  plugins  qml  src
設定 qtcreator
tool/options/Build & Run/Qt Versions add qt5.2 qmake
tool/options/android 設定 sdk, ndk

使用 qtcreator 很容易有問題, 我搭配 adb 指令來把 a3.apk (自己寫的測試程式) 傳到模擬器上。

2014年4月16日 星期三

qt 自動刪除 child object

Memory management in Qt? 提到 qt 會 delete child objects。來看看是怎麼回事。

qt_src/src/corelib/kernel/qobject.h

 1 class Q_CORE_EXPORT QObject
 2 {
 3     Q_OBJECT
 4     Q_PROPERTY(QString objectName READ objectName WRITE setObjectName)
 5     Q_DECLARE_PRIVATE(QObject)
 6 
 7 public:
 8     Q_INVOKABLE explicit QObject(QObject *parent=0);
 9     virtual ~QObject();
10 }

QObject 的 dtor [virtual ~QObject();] 宣告為 virtual, 這就是 qt 可以自動呼叫 child objects dtor 的秘密。這通常在 QWidge 上, 只要 delete main widget, main widget 內的所有 child widget 都會正常的解構, 就不用寫一堆 delete 的程式碼。在某種程度上對於記憶體的管理幫了不少忙。

不需要看 source code, 寫個小程式測試一下就可以證明了。

commit c4ec6abf13142e89c8034ce9a2d9912bc2c6e5f1
https://github.com/descent/progs/tree/master/qt_thread1

測試了這樣的行為。

要符合兩個條件才能使這樣的功能正常運作:

1.
記得把繼承 QWidget 的 parent 傳給 QWidget (L14), 這應該沒問題, 繼承一個 class 通常都會這樣寫。

13 MyWidget::MyWidget ( QWidget * parent, Qt::WindowFlags f)
14   : QWidget(parent, f)
15 {
16 }

2.
18 Widget::Widget():m_label(new QLabel), m_button(new QPushButton("Button")), m_worker(new Worker)
19 {
20   new MyWidget(this);
21 }

要把 this 傳給這個繼承的 widget (L20), 如果傳 0, 無法自己呼叫 dtor, 需要自己手動 delete。

2014年3月31日 星期一

build database drvier postgresql plugin in windows - qt4

env:
windows xp
postgresql 9.3
qt 4.8.5

我將 postgresql 9.3 安裝到 C:\pgsql9.3

修改 src/plugins/sqldrivers/psql/psql.pro
cat src/plugins/sqldrivers/psql/psql.pro
TARGET = qsqlpsql

SOURCES = main.cpp
include(../../../sql/drivers/psql/qsql_psql.pri)

INCLUDEPATH+="C:\pgsql9.3\include"
LIBS+="C:\pgsql9.3\lib\libpq.dll"

include(../qsqldriverbase.pri)

修改 src/sql/drivers/psql/qsql_psql.pri
cat src/sql/drivers/psql/qsql_psql.pri
HEADERS += $$PWD/qsql_psql.h
SOURCES += $$PWD/qsql_psql.cpp
LIBS += "c:\pgsql9.3\lib\libpq.lib"
INCLUDEPATH += "c:\pgsql9.3\include"
unix|win32-g++* {
    LIBS += $$QT_LFLAGS_PSQL
    !contains(LIBS, .*pq.*):LIBS += -lpq
    QMAKE_CXXFLAGS *= $$QT_CFLAGS_PSQL
} else {
    !contains(LIBS, .*pq.*):LIBS += -llibpq -lws2_32 -ladvapi32
}

D:\qt-everywhere-opensource-src-4.8.5>configure -static -release -no-exceptions -no-qt3support -qt-sql-psql -qt-sql-odbc -qt-sql-sqlite -no-opengl

不過編譯出來的 qt 程式需相依 pgsql 9.3 很多 dll, 我直接複製到 C:\pgsql9.3\bin, 省下那些尋找 dll 的麻煩問題。

另外我還使用 static link, 請參考:
in windows using static link for QT application

2013年12月19日 星期四

如何離開有使用 thread 的 qt 程式

env:
ubuntu 12.04 64 bit
qt 4.8.1

這篇提到用 QThread 的四個方法:
http://blog.csdn.net/jiong_1988/article/details/7942738

soure code:
https://github.com/descent/progs/tree/master/qt_thread1
commit 73c8d8a181b94ea8c782c4c3aeae66dbce6bf47a

很好用, 以下是執行結果。
descent@descent-u:qt_thread1$ ./qt_thread1
main: 139740863580032
slots1: 139740729222912

descent@descent-u:qt_thread1$ ps -eLf|grep qt_thread
descent 21876 21553 21876 2 2 16:09 pts/41 00:00:00 ./qt_thread1
descent 21876 21553 21877 0 2 16:09 pts/41 00:00:00 ./qt_thread1

用 ps 查看, 的確有兩個 thread。

但是這篇文章沒說明怎麼離開 thread。

在按下 X 按鈕時要結束程式時, 會看到

QThread: Destroyed while thread is still running

不過程式也的確結束了。

但一定會有點擔心吧? 這樣真的有正常結束程式嗎?

https://github.com/descent/progs/tree/master/qt_thread1
commit e8c84a55923adf2edd9284cc59e1805ba334a576

這個版本做了一點修正, 結果如下。

descent@descent-u:qt_thread1$ ./qt_thread1
main: 140534343182208
slots1: 140534208825088
wait thread end ""
delete thread

沒有 QThread: Destroyed while thread is still running 這訊息, 看來有正常的結束程式。

基本原理就是要結束這個 thread 做的事情, 並離開 thread event loop, 我不確定這是不是正確作法, 不過看來是有效的。

1 ~Widget()
2 {
3   qDebug() << "wait thread end" << objectName();
4   thread->exit(0);
5   while (thread->isFinished() == false);
6   qDebug() << "delete thread";
7   delete thread;
8 }

要結束某個 thread 做的事情有不同作法, 如果是繼承 QThread::run() 這樣的方法來使用 QThread, 得先離開 QThread::run(), 否則 QThread::run() 一直執行中, thread->isFinished() 就不會 return true。

這和我之前的想法不同, 我以為在 thread 執行的那段程式碼結束後, 這個 thread 就會結束, 直到我用 ps -eLf 觀察才知道不是這麼一回事。

至於 thread 是什麼時候產生的? 並不是 new QThread(this), 而是呼叫 start() [thread->start();] 才產生。

2013年8月14日 星期三

build database drvier mysql plugin in windows - qt4

env: windows 7

build mysql plugin in windows environment.
很麻煩, 好像只能從 source code 編譯出來, windows 似乎沒有 binary 的版本 。讓我們從 source code 開始吧!

compiler: mingw 4.4.0
我把 mysql 安裝在
C:/MySQL/MySQL Server 5.1/

和文件上有點不同, 我直接修改 mysql.pro, 加入紅色部份。
edit D:\qt-everywhere-opensource-src-4.7.3\src\plugins\sqldrivers\mysql\mysql.pro

TARGET = qsqlmysql
SOURCES = main.cpp
INCLUDEPATH+="C:/MySQL/MySQL Server 5.1/include"
LIBS+="C:/MySQL/MySQL Server 5.1/lib/opt/libmysql.lib"
include(../../../sql/drivers/mysql/qsql_mysql.pri)
include(../qsqldriverbase.pri)


cd D:\qt-everywhere-opensource-src-4.7.3\src\plugins\sqldrivers\mysql\mysql.pro
D:\qt-everywhere-opensource-src-4.7.3\bin\qmake mysql.pro
在重新 make 即可。

D:\qt-everywhere-opensource-src-4.7.3\plugins\sqldrivers
libqsqlmysql4.a
libqsqlmysqld4.a
qsqlmysql4.dllqsqlmysqld4.dll


還沒完, 到這裡的時候, 我做了測試, 發現雖然編譯出 qsqlmysqld4.dll 這些 dll, 但是 qt 在偵測所有的 sql plging drivers 時, 仍然找不到 qmysql driver, 也就是無法 load qsqlmysqld* 這些 dll。

copy C:\MySQL\MySQL Server 5.1\bin\libmySQL.dll (開頭的參考文件似乎有點錯誤) 到 D:\qt-everywhere-opensource-src-4.7.3\bin 下, 這樣使用

QStringList drivers = QSqlDatabase::drivers();

就可看到 QMYSQL, QMYSQL3 這個 mysql driver 了。

接下來就可以開始測試 sql command。

想要 static link 的版本嗎?請參考:
in windows using static link for QT application

2013年8月8日 星期四

compile qt source code (2) - qt embedded version for x86/linux

20121003 edit

env: ubuntu 10.04 64bit

x86/linux qt embedded 4.8.3 version
我要使用 Shadow building 這樣會比較方便。
顯示 embedded 的編譯選項
../qt-everywhere-opensource-src-4.8.3/configure -embedded --help|less

編譯選項
ref: http://www.qtforum.org/article/36628/compiling-qt-on-i386-to-x86-64.html

這是我用的編譯選項
descent@linux:qt-4.8.3-embedded-x86$
../qt-everywhere-opensource-src-4.8.3/configure -embedded x86 -no-qt3support -xplatform qws/linux-x86_64-g++  -no-largefile -exceptions -no-qt3support         -openssl -no-cups -depths 8,16,18,32 -qt-kbd-tty -qt-kbd-qvfb -qt-kbd-linuxinput -qt-mouse-linuxinput -qt-mouse-qvfb -qt-mouse-pc -opensource -plugin-gfx-directfb  -plugin-gfx-linuxfb -plugin-gfx-qvfb -plugin-gfx-transformed -plugin-gfx-vnc
make
sudo make install

會安裝到 /usr/local/Trolltech/QtEmbedded-4.8.3/

測試:
我使用 qvfb 來做測試, 先執行 qvfb (從你的 linux 安裝套件可以得到或是自己編譯 qt for X 的版本, 從 /qt-4.8.3-x86/tools/qvfb/ 編出來)

/usr/local/Trolltech/QtEmbedded-4.8.3/examples/widgets/analogclock/analogclock  -qws
descent@weiya-linux:qt-4.8.3-embedded-x86$ examples/widgets/sliders/sliders -qws -display QVFb:0


don't compile examples and demo:
http://www.qtcentre.org/threads/25441-how-can-i-don-t-compile-qt-demos-and-examples

http://stackoverflow.com/questions/11832120/qt-embedded-exchanged-colors-bits-red-and-blue

QWS_DISPLAY=LinuxFb:/dev/fb0:depth=16 ./app -qws

20130328 edit

env: debian 32bit
之前的努力結合起來:

參數編譯:
../qt-everywhere-opensource-src-4.8.3/configure -embedded x86 -no-qt3support -xplatform qws/linux-x86-g++  -no-largefile -exceptions -no-qt3support         -openssl -no-cups -depths 8,16,18,32 -qt-kbd-tty -qt-kbd-qvfb -qt-kbd-linuxinput -qt-mouse-linuxinput -qt-mouse-qvfb -qt-mouse-pc -opensource -plugin-gfx-linuxfb -plugin-gfx-qvfb -plugin-gfx-transformed

在我的 eeepc 901 上測試 linux fb 時, 需要移除 i915 module (我直接刪除 i915*.ko), 並且安裝 v86d, 再 modprobe uvesafb, 然後使用 fbset 設定顏色素, 要不然執行都會得到 segment fault。i915 gpu module 除了補強 x driver 外, 似乎還有著 framebuffer 的功能。

fbset -xres 640 -yres 480 -vxres 640 -vyres 480 -depth 8

也可以單純改顏色 16bit。
fbset -depth 16

左邊是 16 bit color, 右邊是 8bit color。

執行指令:
QWS_DISPLAY=LinuxFb:/dev/fb0:depth=16 ./analogclock -qws


旋轉的部份沒有測試成功, 就算加上 -plugin-gfx-transformed, 一直 segment fault。

旋轉部份:
-qt-gfx-transformed 編譯參數

QWSDisplay::setTransformation (1); 加入 qt 程式碼


descent@linux:qt-4.8.3-embedded-x86$
make
sudo make install

設定旋轉的環境變數:
QWS_DISPLAY=LinuxFb:/dev/fb0:depth=16 ./analogclock -qws -display transformed:Rot90

ref:
qt embedded 相關參數

2013年7月14日 星期日

打造 qt 5.1 for android 開發環境

the 1st edition: 20130714
the 2nd edition: 20160303

用 qt 來開發 android app 的支援已經有一陣子, 但我期待著 qt 官方的版本, 我是個有耐心的開發者, 終於讓我等到 qt 5.1 官方的版本。

但是該怎麼開始呢?照著這篇裝很多東西:
http://doc-snapshot.qt-project.org/qt5-stable/qtdoc/android-support.html
在 qtcreator 設定好這些路徑。

執行
adt-bundle-linux-x86-20130522/sdk/tools/android
安裝 android 2.3.3 (api 10)

download for android version.
http://qt-project.org/downloads

選 project android arm gcc 4.4.3


這比之前的版本設定的東西應該還更簡單, but, 如果你夠幸運的話才是這樣的結果。中途遇到很多小問題, 陸續亂 try, 總算有個結果。

我試過好幾個平台
  • ubuntu 10.04 64bit
  • debian 32bit
  • windows xp
遇到各式各樣的的小問題:
qtcreator 無法開啟:
strace 結果顯示卡在 clock_gettime
clock_gettime(CLOCK_MONOTONIC, {5315, 458918574}) = 0
clock_gettime(CLOCK_MONOTONIC, {5315, 459187882}) = 0
poll([{fd=3,   events=POLLIN}, {fd=6, events=POLLIN}, {fd=11, events=POLLIN}, {fd=13,   events=POLLIN}, {fd=16, events=POLLIN}, {fd=22, events=POLLIN}], 6,   169541) = 1 ([{fd=3, revents=POLLIN}])
read(3, "\1\0\0\0\0\0\0\0", 16)         = 8
clock_gettime(CLOCK_MONOTONIC, {5318, 204940484}) = 0
clock_gettime(CLOCK_MONOTONIC, {5318, 205176548}) = 0

Qt Creator 2.7.2:
http://qt-project.org/downloads
我自己 download 下載這版本, qt 5.1 裡頭的 qtcreator 不知道為什麼無法執行起來。

ant 無法正常工作:
http://stackoverflow.com/questions/17483682/qt-5-1-for-android-occurs-error-in-apache-ant/17538419#17538419

ant 和 jdk 並不容易搞定,交給 apt 就好, 我用 apt 安裝就沒遇到這問題了。
install jdk/ant:
sudo apt-get install openjdk-7-jre openjdk-7-jdk 
sudo apt-get install ant

模擬器:

有時候無法正常啟動模擬器執行程式, 很不穩定。

最後在 debian 32bit 環境成功:
uname -a
Linux debian-vm 3.9-1-686-pae #1 SMP Debian 3.9.8-1 i686 GNU/Linux

我已經很少用 IDE, 在 qtcreator 下, 直接按個 run 就通通搞定, 快樂是快樂, 不過 ide 下到底做了什麼事情, 不知道的感覺很不好。

稍微看了一下整個步驟, 大概就是用 ndk 編譯 qt 產生 .so, 然後 qtcreator 產生的 java 程式會使用 jni 來呼叫這個 .so, ant 會使用 qtcreator 產生的 build.xml 來完成剩下的步驟。我看了一下 build.xml, 要手工打造這個可能不容易, 看來還是需要 qtcreator。

ref: Java Native Interface(JNI) 簡介與教學

qtcreator option/android setting
這是 qtcreator 在 apt-get 後自己抓到的路徑:
ant location:  /usr/bin/ant
openjdk location: /usr/lib/jvm/java-7-openjdk-i386

這個沒什麼功能的程式占了 21.72 MB, 也很耗記憶體, 看來不太能用, 等 qt 5.2 了。

20130902 補充:

若是遇到這情形:
http://qt-project.org/forums/viewthread/29299

我的作法是選用 api 17 version 的 emulator。

使用以下指令可以將 apk 複製到 emulator 上。
./adb install -r /home/descent/app1/android/bin/App1-debug-unaligned.apk
ref: http://developer.android.com/tools/help/adb.html

我實在不喜歡操作 qtcreator 這個大怪物, 使用以下 command line 編譯產生 app1.apk:

export ANDROID_NDK_ROOT=/home/descent/android-dev/android-ndk-r8e
~/android-dev/qt51/5.1.0/android_armv7/bin/qmake ~/app1/app1.pro
ant clean debug

上傳到 emulator:
descent@descent-u:platform-tools$ ./adb devices
List of devices attached
emulator-5554    device

./adb install -r ~/app1/android/bin/App1-debug.apk
2620 KB/s (671473 bytes in 0.250s)
pkg: /data/local/tmp/App1-debug.apk
Success

qt 5.X alpha 出了, 來試試: qt 5.4 alpha for android

2013年1月28日 星期一

大富翁 8 存檔修改器, 使用 QT

在網路上找了很多大富翁 8 存檔修改器, 但是沒找到可以用的, 就興起自己來寫一個的念頭。

下載這個修改器: 大富翁 8 存檔修改器

Volume in drive C is winxp
Volume Serial Number is 88E7-D73A

Directory of C:\qt-prog\rich8_edit_save\debug

2010/06/04  上午 08:46              .
2010/06/04  上午 08:46              ..
2009/06/23  上午 02:42            43,008 libgcc_s_dw2-1.dll
2009/01/10  下午 06:32            11,362 mingwm10.dll
2010/05/31  下午 11:25         2,417,664 QtCore4.dll
2010/05/31  下午 11:29        37,816,431 QtCored4.dll
2010/02/11  上午 12:25       161,192,486 QtGuid4.dll
2010/06/03  下午 09:32         1,108,450 rich8_edit_save.exe
2010/06/03  上午 01:17              save
7 File(s)    202,589,401 bytes
3 Dir(s)   1,742,704,640 bytes free

exe 檔案本身 1 MB 左右, 但是要加上需要的 *.dll, 竟然要超過 100 MB, 這太搞笑了吧, 一個存檔修改器要 100 MB 以上, 這可不是什麼大程式阿。

來改用 static link 好了。好像沒想像中容易, 找了一些資料:
http://descent-incoming.blogspot.com/2009/01/alignment.html
終於搞定 static link 問題。

static 版本只要 9 MB 左右, 還是很大就是了。

D:\rich8_edit_save\release>dir
 磁碟區 D 中的磁碟是 DATA
 磁碟區序號:  F70F-6680

 D:\rich8_edit_save\release 的目錄

2012/09/13  上午 08:51              .
2012/09/13  上午 08:51              ..
2012/09/13  上午 08:51             1,179 main.o
2012/09/13  上午 08:51            56,253 main_window.o
2012/09/13  上午 08:51             3,871 moc_main_window.cpp
2012/09/13  上午 08:51            10,694 moc_main_window.o
2012/09/13  上午 08:51           310,702 qrc_rich8_edit_save.cpp
2012/09/13  上午 08:51            60,996 qrc_rich8_edit_save.o
2012/09/13  上午 08:51         9,524,736 rich8_edit_save.exe
2012/09/13  上午 08:51           150,228 rich8_edit_save_res.o
               8 個檔案      10,118,659 位元組
               2 個目錄  28,268,359,680 位元組可用
 

這是修改器的樣子, 看來不怎麼樣, 不過能正常修改最重要, 比網路上那一堆有用多了。

1P 的位址不是固定的, 所以我才有 0x4e20, 0x4e2c, 0x4e38 這三個選項, 我猜測因為這個問題, 所以網路上修改器有的可以成功, 有的不行。但是因為我不知道什麼時候用那個位址, 所以只好都列出來, 讓使用者自己選擇, 使用前請先備份檔案, 免得改壞存檔。

怎麼判斷那個位址是對的呢?這幾個位址都選選看, 會秀出 1P 擁有的卡片、金額, 就是正確的的位址。

我有備份原來檔案的選項, 選取 Setting/Backup File 即可, 不過怕我程式有 bug, 請自己備份比較安心。

有人說有了這個遊戲玩起來就沒意思了, 不會阿!我覺得這樣惡整電腦還蠻好玩的, 要幹嘛就幹嘛, 在大富翁 8 裡頭,有如神般的地位, 增加遊戲耐玩度。

很開心自己可以完成這個修改器, 以前總是使用人家寫好的, 覺得這些人真的好厲害, 到了現在, 我自己竟然也能開發一個。現在的工具比 dos 時代還要好用, 比對一下之後就可猜到來龍去脈, 還好這存檔沒有加密壓縮, 要不然我就搞不定了, 玩個遊戲, 也沒必要這樣做, 又不是破解遊戲保護, 讓玩家改改存檔, 有趣嘛!

對於本修改器, 不提供任何保證, 要用的朋友請自己付全責, 造成電腦有任何意外請自己處理, 我有提供 source code, 有 bug 可以自己修改。 這是用 qt 寫的, 可以在 ms windows, linux/x, mac os 上 compiler, 不過應該只有 ms windows 的版本才有意義。

現金/存款

點數

卡片位置
1P
嗚咪 - 0x4e38
舞美拉 - 0x4e2c

record_01.sav 比較奇怪, 似乎和 2-9 的存檔格式有點差異。

最後一關只有兩人 PK 時, 也不一樣,
1P 0x4e20
2P 0x5010

source code:
https://github.com/descent/rich8_edit_save

2012年7月25日 星期三

gcin qt4-im 的 qmake file

test gcin version: gcin-2.7.8

qt4.pro
 1 
 2 DEFINES+=UNIX
 3 
 4 TEMPLATE = lib
 5 TARGET   = im-gcin
 6 #include(../../qpluginbase.pri)
 7 CONFIG      += qt plugin
 8 INCLUDEPATH = ../im-client
 9 
10 #QTDIR_build:DESTDIR = $$QT_BUILD_TREE/plugins/inputmethods
11 
12 HEADERS += gcin-common-qt.h  \
13 gcin-imcontext-qt.h  \
14 gcin-qt.h
15 
16 SOURCES += gcin-imcontext-qt.cpp  \
17 gcin-qt.cpp  \
18 im-gcin-qt.cpp
19 
20 LIBS        += -L.. -L../im-client/ -lgcin-im-client -lX11
21 
22 target.path += $$[QT_INSTALL_PLUGINS]/inputmethods
23 INSTALLS    += target

編譯 gcin-2.7.8/qt4-im 似乎很容易出錯, 改用 qmake 來產生 makefile 是比較容易編譯成功的方法。qmake 會正確產生需要使用 moc 的 makefile rule, 不用人工去心煩 moc 的問題。

在 gcin-2.7.8/qt4-im 建立上述檔案, 下指令
qmake qt4.pro
即可產生 Makefile。
再打
make 應該可以順利編出 qt4-im module。請確定 qmake 是 qt4 的版本。

2012年7月3日 星期二

qdir 無法讀取中文檔名

可能需要兩個條件才能解決:

LANG="en_US.UTF-8"
LC_ALL="en_US.UTF-8"

QTextCodec::setCodecForLocale(QTextCodec::codecForName("UTF-8"));

以下提的是 linux 環境, 沒有看 source code, 是猜的。

在 linux 上 (unix like), qt 使用 opendir(), readdir(), closedir() 來讀取目錄, 接著 qt 會使用 QTextCodec 來轉換讀取的檔名, 轉換失敗, 自然 QDir 就不會傳回該檔名, 所以在什麼樣的環境會轉換失敗呢?

例如檔名以 big5 編碼, 而選用了 utf8 QTextCodec, 自然會產生問題, 那要怎麼確認, 這應該只有看 source code 才能知道 qt 如何實作, 不過只要確定檔名是以 utf8 編碼, 使用上述的程式碼強制 qt 使用 utf8 QTextCodec, 那就沒問題了。

那怎麼確認檔名的編碼呢?嗯 ... 這是使用者自己要知道的, 別人怎麼會知道你系統的環境呢?不過別擔心, 在現今的 linux 環境下, 大多是 utf8 的檔名編碼, 在 ms windows 下呢?嗯 ... 好像就不是這樣, 沒特別研究, 還是讓專業的來說明好了。

2012年6月26日 星期二

qt layout - spacing & Margins

直接看圖應該就能理解了。

int spacing () const 
void setSpacing ( int ) 

void QLayout::setContentsMargins ( int left, int top, int right, int bottom ) 
void QLayout::getContentsMargins ( int * left, int * top, int * right, int * bottom ) const


  layout->setContentsMargins (0,0,0,0);
  layout->setSpacing(0);


  layout->setContentsMargins (0,0,0,0);


default space and margin

2012年6月6日 星期三

in windows xp using mingw build qt 4.8.2 Input line too long

使用 mingw 在 windows xp 下, build qt 4.8.2 遇到 Input line too long error。


g++ -c -Wall -Wextra -Wreturn-type -fno-strict-aliasing -Wcast-align -Wchar-subscripts -Wformat-security -Wreturn-type -Wno-unused-parameter -Wno-sign-compare -Wno-switch -Wno-switch-enum -Wundef -Wmissing-noreturn -Winit-self -frtti -fexceptions -mthreads -DUNICODE -DQT_LARGEFILE_SUPPORT -DNDEBUG -DBUILDING_QT__=1 -DQT_ASCII_CAST_WARNINGS -DENABLE_XSLT=0 -DENABLE_WEB_TIMING=0 -DENABLE_JAVASCRIPT_DEBUGGER=1 -DENABLE_DATABASE=1 -DENABLE_EVENTSOURCE=1 -DENABLE_OFFLINE_WEB_APPLICATIONS=1 -DENABLE_DOM_STORAGE=1 -DENABLE_ICONDATABASE=1 -DENABLE_CHANNEL_MESSAGING=1 -DENABLE_DIRECTORY_UPLOAD=0 -DENABLE_FILE_SYSTEM=0 -DENABLE_QUOTA=0 -DENABLE_SQLITE=1 -DENABLE_DASHBOARD_SUPPORT=0 -DENABLE_FILTERS=1 -DENABLE_XPATH=1 -DENABLE_WCSS=0 -DENABLE_SHARED_WORKERS=1 -DENABLE_WORKERS=1 -DENABLE_XHTMLMP=0 -DENABLE_DETAILS=1 -DENABLE_METER_TAG=1 -DENABLE_PROGRESS_TAG=1 -DENABLE_BLOB=1 -DENABLE_NOTIFICATIONS=1 -DENABLE_INPUT_SPEECH=0 -DENABLE_INSPECTOR=1 -DENABLE_3D_RENDERING=1 -DENABLE_WEB_AUDIO=0 -DENABLE_WEBGL=0 -DENABLE_MEDIA_STATISTICS=0 -DENABLE_VIDEO_TRACK=0 -DENABLE_TOUCH_ICON_LOADING=0 -DENABLE_ANIMATION_API=0 -DENABLE_SVG=1 -DENABLE_SVG_FONTS=1 -DENABLE_SVG_FOREIGN_OBJECT=1 -DENABLE_SVG_ANIMATION=1 -DENABLE_SVG_AS_IMAGE=1 -DENABLE_SVG_USE=1 -DENABLE_DATALIST=1 -DENABLE_TILED_BACKING_STORE=1 -DENABLE_NETSCAPE_PLUGIN_API=1 -DENABLE_WEB_SOCKETS=1 -DWTF_USE_QT_BEARER=1 -DENABLE_TOUCH_EVENTS=1 -DENABLE_VIDEO=0 -DSQLITE_CORE -DSQLITE_OMIT_LOAD_EXTENSION -DSQLITE_OMIT_COMPLETE -D_HAS_TR1=0 -DBUILDING_JavaScriptCore -DBUILDING_WTF -DBUILDING_WEBKIT -DQT_MAKEDLL -DQT_GUI_LIB -DQT_NETWORK_LIB -DQT_CORE_LIB -DQT_HAVE_MMX -DQT_HAVE_3DNOW -DQT_HAVE_SSE -DQT_HAVE_MMXEXT -DQT_HAVE_SSE2 -DQT_THREAD_SUPPORT -I"..\..\..\..\..\include\QtCore" -I"..\..\..\..\..\include\QtNetwork" -I"..\..\..\..\..\include\QtGui" -I"..\..\..\..\..\include" -I"d:\qt-everywhere-opensource-src-4.8.2\src\3rdparty\webkit\Source\JavaScriptCore" -I"d:\qt-everywhere-opensource-src-4.8.2\src\3rdparty\webkit\Source" -I"d:\qt-everywhere-opensource-src-4.8.2\src\3rdparty\webkit\Source\ThirdParty" -I"d:\qt-everywhere-opensource-src-4.8.2\src\3rdparty\webkit\Source\JavaScriptCore\assembler" -I"d:\qt-everywhere-opensource-src-4.8.2\src\3rdparty\webkit\Source\JavaScriptCore\bytecode" -I"d:\qt-everywhere-opensource-src-4.8.2\src\3rdparty\webkit\Source\JavaScriptCore\bytecompiler" -I"d:\qt-everywhere-opensource-src-4.8.2\src\3rdparty\webkit\Source\JavaScriptCore\heap" -I"d:\qt-everywhere-opensource-src-4.8.2\src\3rdparty\webkit\Source\JavaScriptCore\dfg" -I"d:\qt-everywhere-opensource-src-4.8.2\src\3rdparty\webkit\Source\JavaScriptCore\debugger" -I"d:\qt-everywhere-opensource-src-4.8.2\src\3rdparty\webkit\Source\JavaScriptCore\interpreter" -I"d:\qt-everywhere-opensource-src-4.8.2\src\3rdparty\webkit\Source\JavaScriptCore\jit" -I"d:\qt-everywhere-opensource-src-4.8.2\src\3rdparty\webkit\Source\JavaScriptCore\parser" -I"d:\qt-everywhere-opensource-src-4.8.2\src\3rdparty\webkit\Source\JavaScriptCore\profiler" -I"d:\qt-everywhere-opensource-src-4.8.2\src\3rdparty\webkit\Source\JavaScriptCore\runtime" -I"d:\qt-everywhere-opensource-src-4.8.2\src\3rdparty\webkit\Source\JavaScriptCore\wtf" -I"d:\qt-everywhere-opensource-src-4.8.2\src\3rdparty\webkit\Source\JavaScriptCore\wtf\gobject" -I"d:\qt-everywhere-opensource-src-4.8.2\src\3rdparty\webkit\Source\JavaScriptCore\wtf\symbian" -I"d:\qt-everywhere-opensource-src-4.8.2\src\3rdparty\webkit\Source\JavaScriptCore\wtf\unicode" -I"d:\qt-everywhere-opensource-src-4.8.2\src\3rdparty\webkit\Source\JavaScriptCore\yarr" -I"d:\qt-everywhere-opensource-src-4.8.2\src\3rdparty\webkit\Source\JavaScriptCore\API" -I"d:\qt-everywhere-opensource-src-4.8.2\src\3rdparty\webkit\Source\JavaScriptCore\ForwardingHeaders" -I"d:\qt-everywhere-opensource-src-4.8.2\src\3rdparty\webkit\Source\JavaScriptCore\generated" -I"d:\qt-everywhere-opensource-src-4.8.2\src\3rdparty\webkit\Source\WebCore\bridge\qt" -I"d:\qt-everywhere-opensource-src-4.8.2\src\3rdparty\webkit\Source\WebCore\page\qt" -I"d:\qt-everywhere-opensource-src-4.8.2\src\3rdparty\webkit\Source\WebCore\platform\graphics\qt" -I"d:\qt-everywhere-opensource-src-4.8.2\src\3rdparty\webkit\Source\WebCore\platform\network\qt" -I"d:\qt-everywhere-opensource-src-4.8.2\src\3rdparty\webkit\Source\WebCore\platform\qt" -I"d:\qt-everywhere-opensource-src-4.8.2\src\3rdparty\webkit\Source\WebKit\qt\Api" -I"d:\qt-everywhere-opensource-src-4.8.2\src\3rdparty\webkit\Source\WebKit\qt\WebCoreSupport" -I"d:\qt-everywhere-opensource-src-4.8.2\src\3rdparty\webkit\Source\WebCore" -I"d:\qt-everywhere-opensource-src-4.8.2\src\3rdparty\webkit\Source\WebCore\accessibility" -I"d:\qt-everywhere-opensource-src-4.8.2\src\3rdparty\webkit\Source\WebCore\bindings" -I"d:\qt-everywhere-opensource-src-4.8.2\src\3rdparty\webkit\Source\WebCore\bindings\generic" -I"d:\qt-everywhere-opensource-src-4.8.2\src\3rdparty\webkit\Source\WebCore\bridge" -I"d:\qt-everywhere-opensource-src-4.8.2\src\3rdparty\webkit\Source\WebCore\css" -I"d:\qt-everywhere-opensource-src-4.8.2\src\3rdparty\webkit\Source\WebCore\dom" -I"d:\qt-everywhere-opensource-src-4.8.2\src\3rdparty\webkit\Source\WebCore\dom\default" -I"d:\qt-everywhere-opensource-src-4.8.2\src\3rdparty\webkit\Source\WebCore\editing" -I"d:\qt-everywhere-opensource-src-4.8.2\src\3rdparty\webkit\Source\WebCore\fileapi" -I"d:\qt-everywhere-opensource-src-4.8.2\src\3rdparty\webkit\Source\WebCore\history" -I"d:\qt-everywhere-opensource-src-4.8.2\src\3rdparty\webkit\Source\WebCore\html" -I"d:\qt-everywhere-opensource-src-4.8.2\src\3rdparty\webkit\Source\WebCore\html\canvas" -I"d:\qt-everywhere-opensource-src-4.8.2\src\3rdparty\webkit\Source\WebCore\html\parser" -I"d:\qt-everywhere-opensource-src-4.8.2\src\3rdparty\webkit\Source\WebCore\html\shadow" -I"d:\qt-everywhere-opensource-src-4.8.2\src\3rdparty\webkit\Source\WebCore\inspector" -I"d:\qt-everywhere-opensource-src-4.8.2\src\3rdparty\webkit\Source\WebCore\loader" -I"d:\qt-everywhere-opensource-src-4.8.2\src\3rdparty\webkit\Source\WebCore\loader\appcache" -I"d:\qt-everywhere-opensource-src-4.8.2\src\3rdparty\webkit\Source\WebCore\loader\archive" -I"d:\qt-everywhere-opensource-src-4.8.2\src\3rdparty\webkit\Source\WebCore\loader\cache" -I"d:\qt-everywhere-opensource-src-4.8.2\src\3rdparty\webkit\Source\WebCore\loader\icon" -I"d:\qt-everywhere-opensource-src-4.8.2\src\3rdparty\webkit\Source\WebCore\mathml" -I"d:\qt-everywhere-opensource-src-4.8.2\src\3rdparty\webkit\Source\WebCore\notifications" -I"d:\qt-everywhere-opensource-src-4.8.2\src\3rdparty\webkit\Source\WebCore\page" -I"d:\qt-everywhere-opensource-src-4.8.2\src\3rdparty\webkit\Source\WebCore\page\animation" -I"d:\qt-everywhere-opensource-src-4.8.2\src\3rdparty\webkit\Source\WebCore\platform" -I"d:\qt-everywhere-opensource-src-4.8.2\src\3rdparty\webkit\Source\WebCore\platform\animation" -I"d:\qt-everywhere-opensource-src-4.8.2\src\3rdparty\webkit\Source\WebCore\platform\audio" -I"d:\qt-everywhere-opensource-src-4.8.2\src\3rdparty\webkit\Source\WebCore\platform\graphics" -I"d:\qt-everywhere-opensource-src-4.8.2\src\3rdparty\webkit\Source\WebCore\platform\graphics\filters" -I"d:\qt-everywhere-opensource-src-4.8.2\src\3rdparty\webkit\Source\WebCore\platform\graphics\filters\arm" -I"d:\qt-everywhere-opensource-src-4.8.2\src\3rdparty\webkit\Source\WebCore\platform\graphics\texmap" -I"d:\qt-everywhere-opensource-src-4.8.2\src\3rdparty\webkit\Source\WebCore\platform\graphics\transforms" -I"d:\qt-everywhere-opensource-src-4.8.2\src\3rdparty\webkit\Source\WebCore\platform\image-decoders" -I"d:\qt-everywhere-opensource-src-4.8.2\src\3rdparty\webkit\Source\WebCore\platform\leveldb" -I"d:\qt-everywhere-opensource-src-4.8.2\src\3rdparty\webkit\Source\WebCore\platform\mock" -I"d:\qt-everywhere-opensource-src-4.8.2\src\3rdparty\webkit\Source\WebCore\platform\network" -I"d:\qt-everywhere-opensource-src-4.8.2\src\3rdparty\webkit\Source\WebCore\platform\sql" -I"d:\qt-everywhere-opensource-src-4.8.2\src\3rdparty\webkit\Source\WebCore\platform\text" -I"d:\qt-everywhere-opensource-src-4.8.2\src\3rdparty\webkit\Source\WebCore\platform\text\transcoder" -I"d:\qt-everywhere-opensource-src-4.8.2\src\3rdparty\webkit\Source\WebCore\plugins" -I"d:\qt-everywhere-opensource-src-4.8.2\src\3rdparty\webkit\Source\WebCore\rendering" -I"d:\qt-everywhere-opensource-src-4.8.2\src\3rdparty\webkit\Source\WebCore\rendering\mathml" -I"d:\qt-everywhere-opensource-src-4.8.2\src\3rdparty\webkit\Source\WebCore\rendering\style" -I"d:\qt-everywhere-opensource-src-4.8.2\src\3rdparty\webkit\Source\WebCore\rendering\svg" -I"d:\qt-everywhere-opensource-src-4.8.2\src\3rdparty\webkit\Source\WebCore\storage" -I"d:\qt-everywhere-opensource-src-4.8.2\src\3rdparty\webkit\Source\WebCore\svg" -I"d:\qt-everywhere-opensource-src-4.8.2\src\3rdparty\webkit\Source\WebCore\svg\animation" -I"d:\qt-everywhere-opensource-src-4.8.2\src\3rdparty\webkit\Source\WebCore\svg\graphics" -I"d:\qt-everywhere-opensource-src-4.8.2\src\3rdparty\webkit\Source\WebCore\svg\graphics\filters" -I"d:\qt-everywhere-opensource-src-4.8.2\src\3rdparty\webkit\Source\WebCore\svg\properties" -I"d:\qt-everywhere-opensource-src-4.8.2\src\3rdparty\webkit\Source\WebCore\testing" -I"d:\qt-everywhere-opensource-src-4.8.2\src\3rdparty\webkit\Source\WebCore\webaudio" -I"d:\qt-everywhere-opensource-src-4.8.2\src\3rdparty\webkit\Source\WebCore\websockets" -I"d:\qt-everywhere-opensource-src-4.8.2\src\3rdparty\webkit\Source\WebCore\wml" -I"d:\qt-everywhere-opensource-src-4.8.2\src\3rdparty\webkit\Source\WebCore\workers" -I"d:\qt-everywhere-opensource-src-4.8.2\src\3rdparty\webkit\Source\WebCore\xml" -I"d:\qt-everywhere-opensource-src-4.8.2\src\3rdparty\webkit\Source\WebCore\bridge\jsc" -I"d:\qt-everywhere-opensource-src-4.8.2\src\3rdparty\webkit\Source\WebCore\bindings\js" -I"d:\qt-everywhere-opensource-src-4.8.2\src\3rdparty\webkit\Source\WebCore\bindings\js\specialization" -I"d:\qt-everywhere-opensource-src-4.8.2\src\3rdparty\webkit\Source\WebCore\bridge\c" -I"d:\qt-everywhere-opensource-src-4.8.2\src\3rdparty\webkit\Source\WebCore\testing\js" -I"d:\qt-everywhere-opensource-src-4.8.2\src\3rdparty\webkit\Source\WebCore\generated" -I"d:\qt-everywhere-opensource-src-4.8.2\src\3rdparty\webkit\Source" -I"d:\qt-everywhere-opensource-src-4.8.2\src\3rdparty\webkit\include" -I"..\include\QtWebKit" -I"..\include" -I"d:\qt-everywhere-opensource-src-4.8.2\src\3rdparty\sqlite" -I"d:\qt-everywhere-opensource-src-4.8.2\src\3rdparty\webkit\Source\WebCore\platform\win" -I"d:\qt-everywhere-opensource-src-4.8.2\src\3rdparty\webkit\Source\WebCore\plugins\win" -I"d:\qt-everywhere-opensource-src-4.8.2\src\3rdparty\webkit\Source\WebCore\platform\win" -I"d:\qt-everywhere-opensource-src-4.8.2\src\3rdparty\webkit\Source\WebCore\platform\graphics\win" -I"..\..\..\..\..\include\ActiveQt" -I"tmp\moc\debug_shared" -I"d:\qt-everywhere-opensource-src-4.8.2\src\3rdparty\webkit\Source\WebCore" -I"." -I"d:\qt-everywhere-opensource-src-4.8.2\mkspecs\win32-g++" -o tmp\obj\debug_shared\AccessibilityImageMapLink.o d:\qt-everywhere-opensource-src-4.8.2\src\3rdparty\webkit\Source\WebCore\accessibility\AccessibilityImageMapLink.cpp

果然是有夠長的指令。

ref: http://www.mail-archive.com/kde-windows@kde.org/msg02083.html

沒解決, 因為有另外的問題。

2012年6月1日 星期五

build qt 4.8 using qpa

qt 4.8 使用了新的架構來處理不同的繪圖系統, 在 qt 4.8 稱為  QtLighthouse, qt5 已經改為使用這個架構。在 qt 4.8 則同時有舊的方式和新的架構。就讓我們用 qpa 來編譯 qt 4.8 吧!

$ ls qt-everywhere-opensource-src-4.8.2/src/plugins/platforms

blackberry  eglconvenience      fb_base         linuxfb   platforms.pro  vnc      xlib
cocoa       eglfs               fontdatabases   minimal   qvfb           wayland
directfb    externalplugin.pri  glxconvenience  openkode  uikit          xcb

在 linux/X 上, 我們需要 xcb 這個 plugin 來完成繪圖的動作。xlib 我猜是舊的 qt 用的, qt5 已經強迫使用 xcb。

這裡我使用了shadow build 的方式。建立 qt.x11.x86.qpa 目錄, 在這目錄 compile qt。


../qt-everywhere-opensource-src-4.8.2/configure -no-qt3support -qpa  -opensource
make
make install

安裝後的目錄不是熟悉的 Qt-4.8.2, 而是 QtLighthouse-4.8.2,

$ ls QtLighthouse-4.8.2/plugins/platforms/

libqminimal.so


只有 libqminimal.so plugin, 沒有 xcb, 這個 plugin 無法顯示圖形。


我修改了 qt-everywhere-opensource-src-4.8.2/src/plugins/platforms/platforms.pro
加入
SUBDIRS += xcb
強迫使用 xcb, 這樣就會有 libxcb.so。前題要安裝 xcb 的開發檔案。
xcb 安裝請參考:
http://qt-project.org/wiki/Building_Qt_5_from_Git


至於使用 qpa 編譯出來的程式加上 -platform 就可以指定使用哪個 plugin。
./qt_tetris -platform xcb

2012年5月28日 星期一

QImage::save() 流程

qt-everywhere-opensource-src-4.8.1/src/gui/image/qimage.cpp

QImageData::doImageIO()

qimagewriter.cpp

QImageWriter::write()
{
    if (!d->handler->write(image))
}

handler is QPngHandler:

createWriteHandlerHelper()
{

#ifndef QT_NO_IMAGEFORMAT_PNG
        } else if (testFormat == "png") {
            handler = new QPngHandler;
#endif
}

qpnghandler.cpp

bool QPngHandler::write(const QImage &image)
{
    return write_png_image(image, device(), d->quality, d->gamma, d->description);
}

static bool write_png_image(const QImage &image, QIODevice *device,
                            int quality, float gamma, const QString &description)
{
    QPNGImageWriter writer(device);
    if (quality >= 0) {
        quality = qMin(quality, 100);
        quality = (100-quality) * 9 / 91; // map [0,100] -> [9,0]
    }
    writer.setGamma(gamma);
    return writer.writeImage(image, quality, description);
}
 

qpnghandler.cpp

bool QPNGImageWriter::writeImage(const QImage& image, int off_x, int off_y)
{
    return writeImage(image, -1, QString(), off_x, off_y);
}


bool Q_INTERNAL_WIN_NO_THROW QPNGImageWriter::writeImage(const QImage& image, 
    int quality_in, const QString &description, int off_x_in, int off_y_in)
{ 
... 
    int height = image.height();
    int width = image.width();
    switch (image.format()) {
    case QImage::Format_Mono:
    case QImage::Format_MonoLSB:
    case QImage::Format_Indexed8:
    case QImage::Format_RGB32:
    case QImage::Format_ARGB32:
    case QImage::Format_RGB888:
        {
            png_bytep* row_pointers = new png_bytep[height];
            for (int y=0; y<height; y++)
                row_pointers[y] = (png_bytep)image.constScanLine(y);
            png_write_image(png_ptr, row_pointers);
            delete [] row_pointers;
        }
        break;
    default:
        {
            QImage::Format fmt = image.hasAlphaChannel() ? QImage::Format_ARGB32 : 
                                 QImage::Format_RGB32;
            QImage row;
            png_bytep row_pointers[1];
            for (int y=0; y<height; y++) {
                row = image.copy(0, y, width, 1).convertToFormat(fmt);
                row_pointers[0] = png_bytep(row.constScanLine(0));
                png_write_rows(png_ptr, row_pointers, 1);
            }
        }
        break;
    } 
... 
}

最終呼叫 QPNGImageWriter::writeImage 來把 QImage 的內容存成 png 格式。

2012年5月16日 星期三

成功設定 qt Signals & Slots

要成功 connect signal/slot 似乎要幾個條件:
  1. signal 用到 qt class 要使用 const &
  2. 要繼承 QObject 
  3. 要使用 Q_OBJECT macro
針對第一點:
void image_done(const QImage &image);

以下 non-const variable 無法成功使用 connect 來建立 Signals & Slots
void image_done(QImage &image);
若是 int 則不需要 const int

2012年5月11日 星期五

qt4 to qt5

想把自己的程式從 qt4 -> qt5, 沒想到還蠻費力的, 用到的 QFSFileEngine::tempPath() 竟然沒了, include file 也有點改變。qt5 的 gui 好像漂亮不少。這是我的第一支 qt5 程式。沒有中文輸入法可用, 有空再來搞中文輸入法。

qt5

git: http://qt.gitorious.org/qt/qt5
參閱 README
 ./init-repository --help
把其他 submodule 抓回來

qt4 to qt5: http://wiki.qt-project.org/Transition_from_Qt_4.x_to_Qt5

Building_Qt_5_from_Git:
http://qt-project.org/wiki/Building_Qt_5_from_Git

sudo apt-get install libicu-dev libxslt1-dev

xcb:
qtbase/src/plugins/platforms/xcb/README


webkit and icu error:

明明就已經安裝了 icu library (), 但還是遇到
To build QtWebKit with Qt 5 you need ICU
錯誤訊息


我直接修改
qtwebkit/Source/WTF/WTF.pri

#error("To build QtWebKit with Qt 5 you need ICU")
LIBS += -licui18n -licuuc -licudata

2011年9月7日 星期三

Creating interactive QT hello world GUI application using QT Creator.


有興趣的才看, 說實話, 比起 c++ builder 還是有段距離。我覺得沒有比較好用。還是 vi+makefile 好用。別誤會, 我可不是要故意虐待自己, 有像 c++ builder 這種等級的 RAD 而不只是 IDE, 可能就會轉向投入這樣的開發工具。畢竟每次要搞定那些 layout manager, 那可不是有趣的事情。以前用 BCB 完全不知道有這樣的事情要考慮。

2011年9月5日 星期一

qt HTML Subset

Supported HTML Subset:
file:///usr/local/Trolltech/Qt-4.7.3/doc/html/richtext-html-subset.html

QTextDocument 可用 setHtml() 使用 html 語法來產生 rich text。